got the file, thanks Dean.
on another area, did you build any supports into the A posts?
1959 Peerless Restoration
-
nigel c

- Active Member
- Posts: 44
- Joined: Tue Dec 11, 2012 2:52 am
- Vehicles Owned: Peerless GT phase 1
Peerless GT phase 1
Warwick GT
Toyota MR2 Mk1
Wolseley Hornet Special (1932)
Cluley 14hp open tourer (1926)
BSA M21 (1939)
Claude Butler (1950's) - Location: worcestershire UK
- Contact:
-
HealeyBN7
- Core Member
- Posts: 856
- Joined: Mon Jul 30, 2007 6:33 pm
- Vehicles Owned: 1959 Peerless GT
1960 Austin Healey 3000
1961 Warwick GT
1971 Lotus Europa
1995 Range Rover - Location: Not Thousand Oaks CA
Re: 1959 Peerless Restoration
I filled the A-pillar cavity with foam, continued across the inside of the roof (a to b to c pillar), shaved it and then covered the foam with epoxy and kevlar cloth. It really changed the strength of the roof and overall body. The previous owner or originally it looks like there was a small rusted and delaminated steel tube glassed into the a-pillar. It wasn't attached to the roof or fender in any way.nigel c wrote: did you build any supports into the A posts?
I have to cut slots for the headliner bars, but I should be able to screw into the glass for the upper trim pieces.
-
nigel c
- Active Member
- Posts: 44
- Joined: Tue Dec 11, 2012 2:52 am
- Vehicles Owned: Peerless GT phase 1
Peerless GT phase 1
Warwick GT
Toyota MR2 Mk1
Wolseley Hornet Special (1932)
Cluley 14hp open tourer (1926)
BSA M21 (1939)
Claude Butler (1950's) - Location: worcestershire UK
- Contact:
Re: 1959 Peerless Restoration
good one. the original was a small dia steel tube and yes it didn't reach top or bottom!
I made a spreader plate to and bottom with holes drilled all over for bonding and solid bar up the inside of the pillar. all in stainless
and I still have a crack at the bottom both sides.
trouble is, this design was never meant to be produced in grp, it was a Ali construction and so would have been fine.
I have never seen another grp car with pillars so elegant (read: thin!)
-
nigel c
- Active Member
- Posts: 44
- Joined: Tue Dec 11, 2012 2:52 am
- Vehicles Owned: Peerless GT phase 1
Peerless GT phase 1
Warwick GT
Toyota MR2 Mk1
Wolseley Hornet Special (1932)
Cluley 14hp open tourer (1926)
BSA M21 (1939)
Claude Butler (1950's) - Location: worcestershire UK
- Contact:
Re: 1959 Peerless Restoration
oh and going back to your lovely gutter rails, when you come to do the final fit bed them in with mastic sealant or equivalent....I didn't, I just screwed them back on with stainless steel screws so I could take them off again if I needed too...and I did ....because the first time it rained it pissed through into the car!
-
HealeyBN7
- Core Member
- Posts: 856
- Joined: Mon Jul 30, 2007 6:33 pm
- Vehicles Owned: 1959 Peerless GT
1960 Austin Healey 3000
1961 Warwick GT
1971 Lotus Europa
1995 Range Rover - Location: Not Thousand Oaks CA
Re: 1959 Peerless Restoration
The body work continues... Tackled the top fender feature lines and continued to coat the body work in a gray clear gelcoat. It isn't too difficult to sand and block the gelcoat once it hardens, but the real goal here is to find the pinholes and create a boundary layer that will prevent the major repairs from coming back through the paint.
Once I am satisfied that I won't sand through the gelcoat while blocking, I'll coat the car in epoxy before adding a sandable prime coat.
It is starting to look like a car that could actually be painted one day.
Once I am satisfied that I won't sand through the gelcoat while blocking, I'll coat the car in epoxy before adding a sandable prime coat.
It is starting to look like a car that could actually be painted one day.
- Attachments
-
- IMG_4108.JPG (110.31 KiB) Viewed 42296 times
-
- IMG_4114.JPG (121.86 KiB) Viewed 42296 times
-
- IMG_4131.JPG (124.68 KiB) Viewed 42296 times
-
Martin Keller
- Core Member
- Posts: 952
- Joined: Tue Sep 18, 2007 10:04 pm
- Location: Ventura, Ca.
Re: 1959 Peerless Restoration
Hi Dean,
Well that is looking good.
I remember it when it was not much more than just a disolving body inside of a chain link fence.
Very nice.

Well that is looking good.
I remember it when it was not much more than just a disolving body inside of a chain link fence.
Very nice.
Martin Keller
Ventura, Ca.
Ventura, Ca.
-
VWNate1
- Veteran Member
- Posts: 1402
- Joined: Sat Sep 05, 2009 7:41 am
- Vehicles Owned: LBC's
Mercedes Diesels OM 616 & 617
1969 Chevrolet C/10 pickup shop truck
250 I-6 , TH350 slushbox
1959 Nash Metropolitan FH Sports Coupe
1961 Morris Minor W/ 1973 1275 CC engine & gearbox
Ural Solo Motos , old Honda 90 CC Tiddlers - Location: Sunny So. Cal. , land of fruits , nuts & flakes
Re: 1959 Peerless Restoration
Wow ;
I can hardly wait until you bring it on one of our fun runs ! .
.
This car is beautiful and you're making sure it has no peers .
I can hardly wait until you bring it on one of our fun runs !
This car is beautiful and you're making sure it has no peers .
-Nate
-
tannyo

- Veteran Member
- Posts: 1057
- Joined: Wed May 20, 2009 1:58 pm
- Vehicles Owned: 1967 MGB GT
- Location: North Hollywood, CA
- Contact:
Re: 1959 Peerless Restoration
Wow! It's really starting to look like a car once you put it on the frame. One might even say it looks beautiful.
-
HealeyBN7
- Core Member
- Posts: 856
- Joined: Mon Jul 30, 2007 6:33 pm
- Vehicles Owned: 1959 Peerless GT
1960 Austin Healey 3000
1961 Warwick GT
1971 Lotus Europa
1995 Range Rover - Location: Not Thousand Oaks CA
Re: 1959 Peerless Restoration
Let's not go overboard:)tannyo wrote: One might even say it looks beautiful.
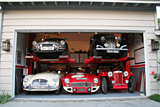
I decided to finish up some of the sanding on the lift inside the barn. I had been resisting this due to the mess it will make, but with a vacuum near by and the damp weather it hasn't been too dusty.
First job was to finish up the front end. To fix some of the "sag" I chopped out a section of the lower right fender to bring it align it with the left side. It had to remove about 3/4 of an inch if material then reshape it to look somewhat like the other side.
While I don'ts have pictures of the changes to the number box, it too was cut and straightened. I don't think anyone will care or notice these adjustments, but I know I wouldn't have been able to look at the car on the lift knowing that I could/should have fixed these areas before paint.
Finally the chrome headlight trim rings needed to be test fitted. Good thing Larry and Nigel talked me into trying these on as it took a full day of sanding and adjusting to get them to look like they belonged.
The front now has a single coat of gelcoat. I have some more pinholes to fill and more areas to flatten, but I am going to hold off on that and work on the under tail section and get it to the same stage next...
- Attachments
-
- IMG_4175.JPG (88.42 KiB) Viewed 42247 times
-
- IMG_4178.JPG (96.51 KiB) Viewed 42247 times
-
- IMG_4181.JPG (103.71 KiB) Viewed 42247 times
-
- IMG_4194.JPG (95.24 KiB) Viewed 42247 times
-
- IMG_4196.JPG (118.12 KiB) Viewed 42247 times
-
- IMG_4198.JPG (92.74 KiB) Viewed 42247 times
-
wellwoodautorestoration
- Active Member
- Posts: 128
- Joined: Fri Apr 20, 2007 8:21 am
- Location: Ventura, CA
Re: 1959 Peerless Restoration
Dean. I can really appreciate the job you have done on my old Peerless and the time and effort invloved! I don't think I would have ever gone to the lengths you have to build this car. So "Good Job!" Carry on and I hope to have a ride when it is all done.
Cheers, Dave
Cheers, Dave
-
nigel c
- Active Member
- Posts: 44
- Joined: Tue Dec 11, 2012 2:52 am
- Vehicles Owned: Peerless GT phase 1
Peerless GT phase 1
Warwick GT
Toyota MR2 Mk1
Wolseley Hornet Special (1932)
Cluley 14hp open tourer (1926)
BSA M21 (1939)
Claude Butler (1950's) - Location: worcestershire UK
- Contact:
Re: 1959 Peerless Restoration
stop it now Dean, this is just getting boring........... 

-
Steve Simmons
- Site Admin
- Posts: 4106
- Joined: Thu Sep 07, 2006 9:45 pm
- Vehicles Owned: .
1937 MG SA Saloon
1946 John Deere AN
1949 MG TC
1953 MG TD
1958 MGA Roadster
1959 Morris Minor 1000
1965 MGB
1967 MGB GT (UK-Spec)
1967 Austin Healey 3000 BJ8
1969 MGC GTS - Location: Co-Nay-Ho Valley
- Contact:
Re: 1959 Peerless Restoration
It's making me self-conscious about the straightness of my own car. And my car is steel!
-
tannyo
- Veteran Member
- Posts: 1057
- Joined: Wed May 20, 2009 1:58 pm
- Vehicles Owned: 1967 MGB GT
- Location: North Hollywood, CA
- Contact:
Re: 1959 Peerless Restoration
Me too.Steve Simmons wrote:It's making me self-conscious about the straightness of my own car. And my car is steel!
-
Larry Kluss
- Veteran Member
- Posts: 1088
- Joined: Wed Jul 25, 2007 12:28 pm
- Vehicles Owned: -
1967 MGB (Works tribute)
1968 E-type Jaguar FHC
1974 Chevy Nova SS (faux)
2000 Ford Ranger XLT
2008 Jaguar XJ L - Location: Conejo Valley
Re: 1959 Peerless Restoration
It looks great all one color! I can really picture the finished product now. I like the original headlight trim rings. They are so unique and help give the phase I cars a special character.
-
HealeyBN7
- Core Member
- Posts: 856
- Joined: Mon Jul 30, 2007 6:33 pm
- Vehicles Owned: 1959 Peerless GT
1960 Austin Healey 3000
1961 Warwick GT
1971 Lotus Europa
1995 Range Rover - Location: Not Thousand Oaks CA
Re: 1959 Peerless Restoration
The last couple days have been bumper days...
The Peerless didn't come with bumpers. It should have, but they were long removed and lost years before I saw the car. So before finishing the body work getting bumpers to fit would be prudent.
Fortunately I had a slight head start. A few years ago Dave C lent his front bumpers to a fellow Peerless owner and he created two front urethane molds. Now, I just needed back bumpers to make molds and Dave graciously lent me his.
The process for filling the front mold to create a bumper and creating the rear mold are similar, so I decided to tackle both at the same time. The process looks like this:
1. wax the mold with mold release - parting wax 5 times
2. spray the parts with PVA (a mold release film that smells like white glue and creates flexible bag like film over the part)
3. coat the part with gelcoat (several layers)
4. lay in tissue to prevent the next layers of mat from showing through
5. load the part with mat and resin...repeat until strong enough
6. pray you can get them apart (and not damage Dave's bumpers)
Dean
- Attachments
-
- Dave's perfect Peerless bumpers
- IMG_4234.JPG (93.34 KiB) Viewed 42189 times
-
- Getting lots of wax and PVA
- IMG_4235.JPG (98.19 KiB) Viewed 42189 times
-
- Drying
- IMG_4238.JPG (108.66 KiB) Viewed 42189 times
-
- Slopped with white gelcoat
- IMG_4243.JPG (74.17 KiB) Viewed 42189 times
-
- Applying tissue
- IMG_4249.JPG (90.13 KiB) Viewed 42189 times
-
- Mat and resin getting applied
- IMG_4253.JPG (107.03 KiB) Viewed 42189 times
-
- IMG_4260.JPG (94.31 KiB) Viewed 42189 times
-
- IMG_4245.JPG (111.99 KiB) Viewed 42189 times
-
- Removal!
- IMG_4261.JPG (109.43 KiB) Viewed 42189 times
-
- First fit - Better to trim then to add...
- IMG_4262.JPG (87.08 KiB) Viewed 42189 times
Last edited by HealeyBN7 on Sat Feb 25, 2017 10:05 am, edited 1 time in total.
-
HealeyBN7
- Core Member
- Posts: 856
- Joined: Mon Jul 30, 2007 6:33 pm
- Vehicles Owned: 1959 Peerless GT
1960 Austin Healey 3000
1961 Warwick GT
1971 Lotus Europa
1995 Range Rover - Location: Not Thousand Oaks CA
Re: 1959 Peerless Restoration
a few more pictures....
- Attachments
-
- Dave's bumpers re-emerge
- IMG_4268.JPG (127.6 KiB) Viewed 42188 times
-
- IMG_4271.JPG (106.89 KiB) Viewed 42188 times
-
- This is why you can't use Warwick bumpers - different style
- IMG_4275.JPG (98.69 KiB) Viewed 42188 times
-
- IMG_4286.JPG (110.17 KiB) Viewed 42188 times
-
- IMG_4288.JPG (99.04 KiB) Viewed 42188 times
-
- IMG_4289.JPG (86.1 KiB) Viewed 42188 times
-
nigel c
- Active Member
- Posts: 44
- Joined: Tue Dec 11, 2012 2:52 am
- Vehicles Owned: Peerless GT phase 1
Peerless GT phase 1
Warwick GT
Toyota MR2 Mk1
Wolseley Hornet Special (1932)
Cluley 14hp open tourer (1926)
BSA M21 (1939)
Claude Butler (1950's) - Location: worcestershire UK
- Contact:
Re: 1959 Peerless Restoration
aaaar I love the smell of resin first thing in the morning.......
nice work and I am going through just the same process at the moment in my workshop but would you believe seats for oil drums not Peerli parts! ho hum.....
nice work and I am going through just the same process at the moment in my workshop but would you believe seats for oil drums not Peerli parts! ho hum.....
-
nigel c
- Active Member
- Posts: 44
- Joined: Tue Dec 11, 2012 2:52 am
- Vehicles Owned: Peerless GT phase 1
Peerless GT phase 1
Warwick GT
Toyota MR2 Mk1
Wolseley Hornet Special (1932)
Cluley 14hp open tourer (1926)
BSA M21 (1939)
Claude Butler (1950's) - Location: worcestershire UK
- Contact:
Re: 1959 Peerless Restoration
just looking at the front of the Peerless there, how promanant are the "plinths" for the side light/indicators?
-
HealeyBN7
- Core Member
- Posts: 856
- Joined: Mon Jul 30, 2007 6:33 pm
- Vehicles Owned: 1959 Peerless GT
1960 Austin Healey 3000
1961 Warwick GT
1971 Lotus Europa
1995 Range Rover - Location: Not Thousand Oaks CA
Re: 1959 Peerless Restoration
Hmm Maybe a 1/4 inch at the bottom and they flatten back to the body below the headlight. I can check the Warwick...nigel c wrote:just looking at the front of the Peerless there, how promanant are the "plinths" for the side light/indicators?
-
HealeyBN7
- Core Member
- Posts: 856
- Joined: Mon Jul 30, 2007 6:33 pm
- Vehicles Owned: 1959 Peerless GT
1960 Austin Healey 3000
1961 Warwick GT
1971 Lotus Europa
1995 Range Rover - Location: Not Thousand Oaks CA
Re: 1959 Peerless Restoration
Here is a shot of the bodies at the James Whitson and Co factory.
In the second photo you can see original bumper fabricator working away with just a tub of resin, a couple mo(u)lds and a table top.
Not much change from today.
In the second photo you can see original bumper fabricator working away with just a tub of resin, a couple mo(u)lds and a table top.
Not much change from today.
- Attachments
-
-
- bumpers original fabricator.jpg (28.32 KiB) Viewed 42165 times
-
-
Steve Simmons
- Site Admin
- Posts: 4106
- Joined: Thu Sep 07, 2006 9:45 pm
- Vehicles Owned: .
1937 MG SA Saloon
1946 John Deere AN
1949 MG TC
1953 MG TD
1958 MGA Roadster
1959 Morris Minor 1000
1965 MGB
1967 MGB GT (UK-Spec)
1967 Austin Healey 3000 BJ8
1969 MGC GTS - Location: Co-Nay-Ho Valley
- Contact:
Re: 1959 Peerless Restoration
I have a question about the original factory photo. Where are all the empty beer bottles?
-
Martin Keller
- Core Member
- Posts: 952
- Joined: Tue Sep 18, 2007 10:04 pm
- Location: Ventura, Ca.
Re: 1959 Peerless Restoration
Under the table.......Steve Simmons wrote:I have a question about the original factory photo. Where are all the empty beer bottles?
Martin Keller
Ventura, Ca.
Ventura, Ca.
-
nigel c
- Active Member
- Posts: 44
- Joined: Tue Dec 11, 2012 2:52 am
- Vehicles Owned: Peerless GT phase 1
Peerless GT phase 1
Warwick GT
Toyota MR2 Mk1
Wolseley Hornet Special (1932)
Cluley 14hp open tourer (1926)
BSA M21 (1939)
Claude Butler (1950's) - Location: worcestershire UK
- Contact:
Re: 1959 Peerless Restoration
I notice dean hasn't gone for the polythene off the shoulder number either, I thought this was a true replication of the original production line!
On the side light "plinths" matter that sounds about right. They are quite easy to rub off/loose in all the process' you have gone through....have to keep an eye on standards you understand.....
On the side light "plinths" matter that sounds about right. They are quite easy to rub off/loose in all the process' you have gone through....have to keep an eye on standards you understand.....
-
DaveC
- Active Member
- Posts: 70
- Joined: Sun Jan 01, 2012 3:38 am
- Vehicles Owned: 59 Peerless GT
63 Morgan Plus4 - Location: Santa Monica, CA
Re: 1959 Peerless Restoration
Wow - they look as good as new! Speedy-quick work too.
-
HealeyBN7
- Core Member
- Posts: 856
- Joined: Mon Jul 30, 2007 6:33 pm
- Vehicles Owned: 1959 Peerless GT
1960 Austin Healey 3000
1961 Warwick GT
1971 Lotus Europa
1995 Range Rover - Location: Not Thousand Oaks CA
Re: 1959 Peerless Restoration
Dave, Thank you so much for lending me the bumpers. There were a few moments when I wondered if you made a wise decision.DaveC wrote:Wow - they look as good as new! Speedy-quick work too.
Dean