I know it has been a long time, but I ran out of excuses to start the Peerless body work.
First step was completing the stripping of the grunge, paint and interior surfaces. A new soda blaster, 200lbs of soda and a couple dozen 40 grit grinding disks removed most of the surface cracks and prior repairs. I still have the hood, trunk and a door to finish up.
Here in this picture you can see the bare body on the buck after the soda blasting.

- IMG-20130727-00425.jpg (141.8 KiB) Viewed 32953 times
Unfortunately the prior sanding and soda blasting wasn't enough to chase out all the stress cracks. Cracks are everywhere. Here you can see a close up of a fender that where the paint was sanded off, but not deep enough to deal with the cracking resin.

- IMG-20130727-00441.jpg (65.4 KiB) Viewed 32953 times
Here is a sort of before/after shot. On half of the fender the cracks were chased and removed. The other half still needed to be done. The gray filler is old bondo. It was used to form the top of the fender detail. A difficult feature that will have to be recreated.

- IMG-20130728-00445.jpg (75.39 KiB) Viewed 32953 times
Most of the body had been hit and repaired. No single panel was spared. In one case a fender detail was created with just resin. 1 1/2" of resin with no mat or weave.

- IMG-20130803-00466.jpg (123.74 KiB) Viewed 32953 times
In another area they used expanded steel, wood and toggle screws to form a fender.

- IMG-20130802-00458.jpg (130.58 KiB) Viewed 32953 times
I found what looks like a replacement "A" piller post after grinding away course weave and several layers of dry cloth. I should be able to save it and glass it back in with chopped mat.

- IMG-20130727-00438.jpg (78.21 KiB) Viewed 32953 times
If you are wondering what goes here, so was I. The cut, screw holes and 2" gap was a contender for the largest single formation of bondo ever outside of a gallon can.

- IMG-20130727-00439.jpg (115.15 KiB) Viewed 32953 times
After the really offending sections had been removed you can see that there wasn't much left to work with.
- IMG-20130802-00460.jpg (131.7 KiB) Viewed 32953 times
There are several areas like the nose section that I soon realized that if I were to remove all the poorly repaired weave, I wouldn't have anything left and that would only be feasible if I had another car to pull a mold from....wish I knew where I could find another Peerless or Warwick.
- IMG-20130727-00433.jpg (118.35 KiB) Viewed 32953 times
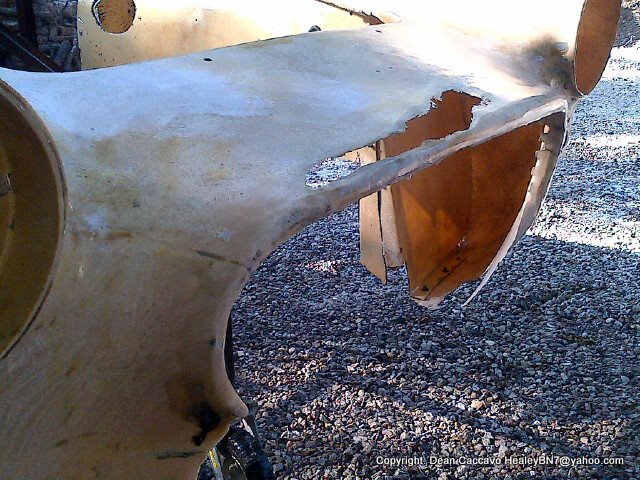
The tail section that was hit and repaired. I'll have to remove the lower section completely to get out all the dry cloth. I am holding off on this removal until I fit the side fenders.
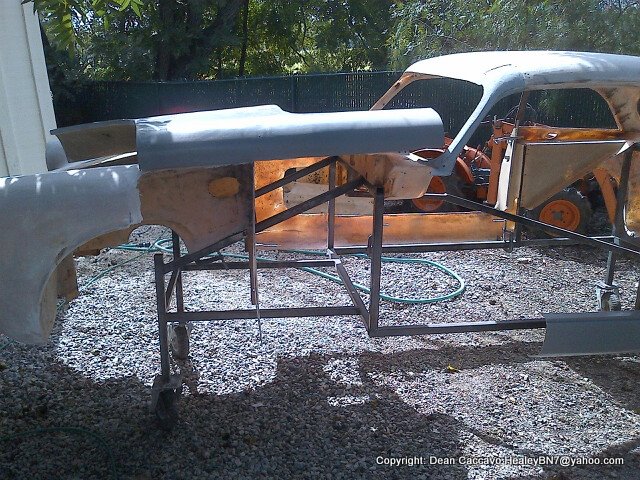
In this last shot you can see the replacement panels being offered up to the reinforced chassis. There are now steel struts holding the roof and additional braces holding the corners of the fenders.

- IMG-20130803-00464.jpg (86.57 KiB) Viewed 32953 times
Hope to start glassing some things back together this weekend. I think the best place to start is the rear fender or B pillar as I can set that square with the pop out window. From there the door hinges will need to be installed on the temporary frame, so the door and front fender can be fitted. fun fun